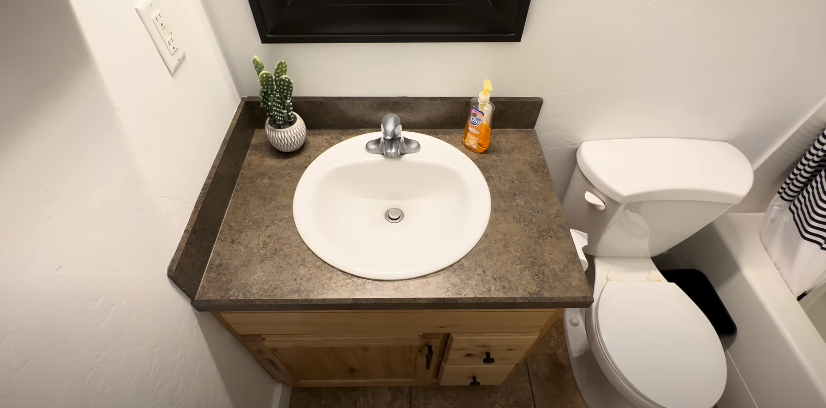
So, you’ve just had a brand-new bathroom installed. The tiles sparkle, the chrome shines, and it feels like you’re living inside a spa brochure. But then reality creeps in—you notice a leaky tap, grout lines that don’t quite match, or maybe the shower doesn’t drain as fast as it should. The frustrating truth is this: new bathrooms often come with little flaws, defects, or “snags” that need fixing.
Don’t worry—you’re not alone. Almost every homeowner who goes through a bathroom renovation faces a snagging list afterward. The good news? Most of these problems are completely fixable without tearing out your new space. Think of it less like a disaster and more like fine-tuning a brand-new car—some adjustments are just part of the process.
Why Do New Bathrooms Need Fixing?
You might be wondering, “If it’s new, shouldn’t it be perfect?” In theory, yes. In reality, construction and installation involve dozens of materials, tradespeople, and moving parts. Even the best contractor can leave behind minor issues.
Some reasons include:
- Human error: A rushed grout job, slightly crooked tile, or loosely fitted fixture.
- Material settling: Sealants shrink, grout cures unevenly, or silicone peels if surfaces weren’t bone-dry.
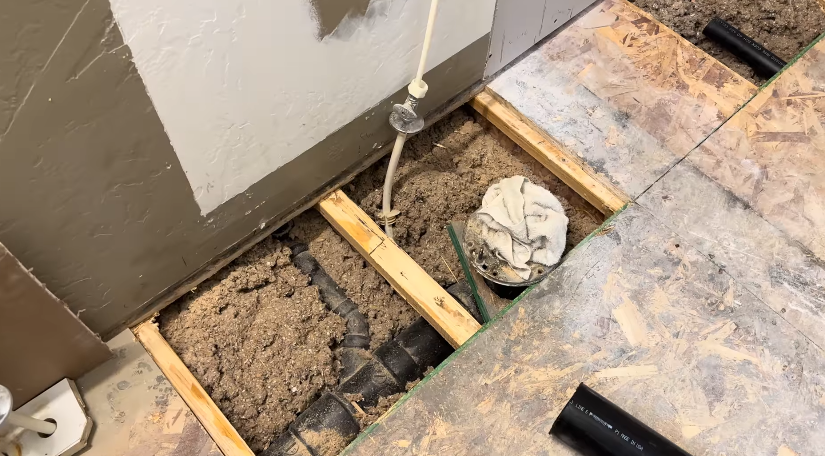
- Plumbing quirks: Even brand-new pipework can develop drips or misalignments once water pressure kicks in.
- Ventilation gaps: Installers focus on tiles and fixtures but sometimes skimp on fans, leading to condensation.
According to the U.K. HomeOwners Alliance, over 90% of homeowners who undergo major renovations report snags or defects afterward. Bathrooms, being moisture-heavy and detail-sensitive, are one of the most common problem areas.
I’ve seen it first-hand: my cousin’s brand-new en-suite looked like a magazine cover… until the first shower revealed water pooling in the corner because the slope was off. The fix? A simple adjustment of the tray seal and drainage angle. Annoying? Yes. Permanent problem? No.
Step 1: Make a Snagging List
Before you rush in with a tube of silicone and a wrench, take time to inspect your bathroom like a detective. A snagging list is essentially a punch list of all issues, big and small. Write them down, photograph them, and keep track.
Things to check:
- Leaks: Look under sinks, at toilet bases, and around shower joints. Even a tiny drip can rot cabinetry or flooring over time.
- Grout and sealant: Are there cracks, missing sections, or messy finishes? Water sneaks through the smallest gaps.
- Fixtures: Do taps wobble? Do they drip? Does the toilet flush smoothly?
- Drainage: Does water pool in the shower tray or bath? Slope problems are surprisingly common.
- Ventilation: Does the extractor fan actually pull moisture out, or is it just humming?
- Aesthetic issues: Crooked towel rails, uneven tile cuts, scratches, or paint splashes on fittings.
Treat this like an inspection, not nitpicking. If you catch issues early, you save money and headaches later.
Step 2: Fixing Leaks in a New Bathroom
Leaks are the number-one complaint in new bathrooms. Left unchecked, they’re also the costliest.
Why They Happen
- Loose fittings during installation.
- Incorrectly applied or missing silicone.
- Damaged washers in taps (yes, even new ones sometimes fail).
- Misaligned pipes.
How to Fix
- For loose connections, tighten gently with a wrench. Don’t over-tighten—it can crack fittings.
- Replace faulty washers (cheap and easy).
- Reapply bathroom-grade silicone around sinks, baths, and shower edges. Always remove old silicone first.
- If water is dripping behind walls, call a plumber—hidden leaks are not DIY territory.
Statistic to keep in mind: Water damage claims are among the most expensive home insurance issues, averaging $11,650 per incident in the U.S. (Insurance Information Institute). A little drip now could be a financial flood later.
Step 3: Grout and Sealant Repairs
Fresh bathrooms often have grout problems: it crumbles, cracks, or looks patchy.
Why It Happens
- Tiles weren’t grouted evenly.
- Grout dried too quickly or wasn’t sealed.
- Silicone applied to damp surfaces.
How to Fix
- Scrape out cracked or loose grout with a grout rake.
- Reapply fresh grout in the joints, pressing firmly with a float.
- Seal grout after curing—this prevents mold and staining.
- For silicone, remove old beads completely (never just apply over). Clean, dry, and reapply a smooth line.
Personal story: When my own bathroom was installed, I noticed the silicone had tiny gaps where the wall met the bath. Within weeks, mold crept in. Re-doing it myself with patience and painter’s tape gave a professional finish—and zero mold since.
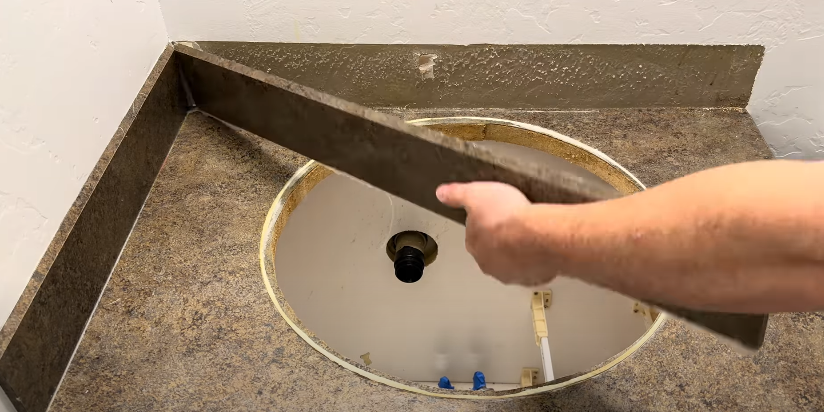
Step 4: Fixing Poor Drainage
There’s nothing more frustrating than standing in a puddle during your shower because the water won’t drain.

Why It Happens
- Incorrect slope on the shower tray or floor.
- Blocked or poorly fitted trap.
- Debris left in new pipes (yes, installers sometimes forget to flush them).
How to Fix
- Start simple: check for blockages using a plunger or drain snake.
- Clean out the trap (that U-shaped piece under the shower or sink).
- If it’s a slope problem, unfortunately, this may require a tiler to re-level.
Fun fact: Shower drains should ideally have a slope of at least 2% (2 cm drop per meter) for proper flow. Anything less, and puddles form.
Step 5: Improving Ventilation
Even brand-new bathrooms often fail in this department. Without proper airflow, you’ll get damp patches and mold, no matter how fresh your renovation looks.
How to Fix
- Upgrade to a fan with at least 15 litres per second extraction rate.
- Install a humidity-sensing fan that turns on automatically.
- Always leave the door open slightly after showering.
- Crack a window if you have one.
Stat: According to the U.S. Environmental Protection Agency, indoor air can be 2–5 times more polluted than outdoor air, and poorly ventilated bathrooms are a big contributor due to mold and chemical cleaners.
Step 6: Stabilizing Wobbly Fixtures
A new sink or toilet shouldn’t wobble—but it happens more than you’d think.
Why It Happens
- Poor anchoring during installation.
- Missing silicone base support.
How to Fix
- Tighten toilet bolts (but don’t overtighten; porcelain cracks easily).
- Add silicone around the base of the toilet or pedestal sink for extra stability.
- Re-secure towel rails and accessories with proper wall plugs if they feel loose.
Step 7: Cosmetic Fixes
Sometimes the fixes aren’t about leaks or drainage but simply making your bathroom look as flawless as it should.
- Scratched tiles: Use a ceramic repair kit.
- Uneven paint: Sand lightly and repaint with mold-resistant bathroom paint.
- Crooked fittings: Re-drill with a level—worth it for long-term peace of mind.
A study by Houzz found that 42% of homeowners feel dissatisfied with the “finishing details” of renovations. Fixing these snags can dramatically improve your daily experience in the space.
Step 8: Protecting Your New Bathroom Long-Term
Fixing is step one; preventing problems is step two.
- Seal grout once a year.
- Reseal silicone every 2–3 years.
- Clean extractor fans every 6 months.
- Watch for small leaks and address them immediately.
- Avoid harsh cleaners that eat away at grout and finishes.
Think of it like car maintenance: a little care regularly saves you from expensive breakdowns.
When to Call the Contractor Back
If your bathroom is still under warranty (and most reputable contractors offer at least 12 months), don’t hesitate to call them back for:
- Persistent leaks.
- Uneven or cracked tiles.
- Faulty fixtures.
- Major drainage issues.
Reputable companies expect snag lists—it’s part of the business.
Final Thoughts
A “new bathroom” should feel like a luxury upgrade, not a stress factory. But the truth is, most new bathrooms need a little fixing and fine-tuning. Leaks, grout cracks, wobbly fixtures, and poor ventilation are common—but they’re also fixable.
Think of your bathroom as a brand-new orchestra. The instruments are all there, but you may need to do a little tuning before the music flows smoothly.
Because at the end of the day, nothing beats stepping into a bathroom that feels not just new, but perfectly finished and problem-free.