Water is your bathroom’s best friend and worst enemy. While it’s meant to flow through taps, showers, and drains, when it leaks, seeps, or floods, it can wreak havoc.
Water damage in a bathroom is one of the most common home repair challenges, and if not handled correctly, it can lead to mold growth, structural rot, and expensive repairs.
The good news? With the right approach, tools, and mindset, you can fix water damage and restore your bathroom to a safe, clean, and functional space.
Understanding the Causes of Water Damage in Bathrooms
Before you can fix it, you need to know why it happened in the first place. Bathrooms are the wettest rooms in a home, which makes them prone to leaks and seepage.
Common causes include:
- Leaking pipes: Hidden behind walls or under floors, a tiny drip can slowly destroy wood and plaster.
- Faulty seals and grout: Cracked tiles or peeling caulk around tubs and showers let water seep behind surfaces.
- Overflow accidents: Think bathtubs or sinks left running—yes, it happens more often than you’d expect.
- Poor ventilation: Steam that doesn’t escape condenses on walls and ceilings, encouraging mold and moisture buildup.
- Toilet leaks: A failing wax ring under the toilet base can let water seep into the floor for months undetected.
According to the Insurance Information Institute, water damage accounts for nearly 23% of all homeowners’ insurance claims, and bathrooms are one of the top sources. That means prevention and quick response matter.
Step 1: Inspect the Extent of Water Damage
Think of this like detective work. Grab a flashlight, gloves, and maybe a mask if you suspect mold.
Check these areas carefully:
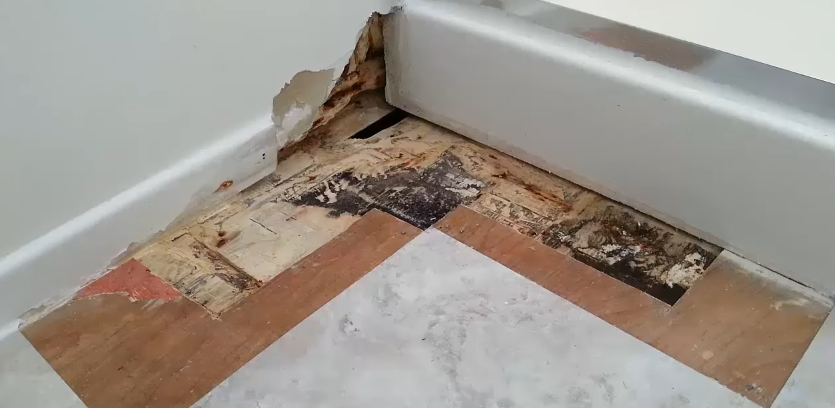
- Flooring: Soft spots, discoloration, or tiles lifting.
- Walls: Bubbling paint, peeling wallpaper, or visible damp patches.
- Ceiling below the bathroom: If you see stains downstairs, it’s almost certainly a leak from above.
- Fixtures: Around toilets, sinks, tubs, and showers.
- Ventilation system: Signs of rust, mold, or water drips.
A professional-grade moisture meter can help determine how deep the water has penetrated. If you don’t have one, you can rent one at most hardware stores.
Personal note: When I repaired my first water-damaged bathroom, I thought the damage was “just a small patch of peeling paint.” But after pulling up one loose tile, I found the entire plywood subfloor had rotted. Lesson learned—always check under the surface.
Step 2: Stop the Source of Water
This is priority number one. No matter how much repair you do, if water keeps coming, you’re wasting time.
- Turn off the water supply to the bathroom or the whole house if necessary.
- If the problem is a leaking pipe, call a plumber unless you’re confident with DIY plumbing.
- For condensation issues, check if the extractor fan works properly or if you need a stronger model.
Only once you stop the leak or moisture source should you move on to repairs.
Step 3: Dry Out the Area Thoroughly
Water damage repair starts with drying. Skipping this step is like painting over rust—it’ll come back worse.
Methods:
- Ventilation: Open windows and doors to allow airflow.
- Fans and dehumidifiers: Run them for several days. A dehumidifier can pull out 10–20 liters of water per day from damp air.
- Remove wet materials: Rugs, towels, and any soaked furniture must be taken out immediately.
- Lift flooring if necessary: If the water seeped underneath vinyl, laminate, or tiles, lift them up to dry the subfloor.
Tip: Drying may take 3–7 days depending on the extent of damage. Be patient—starting repairs too soon risks trapping moisture.
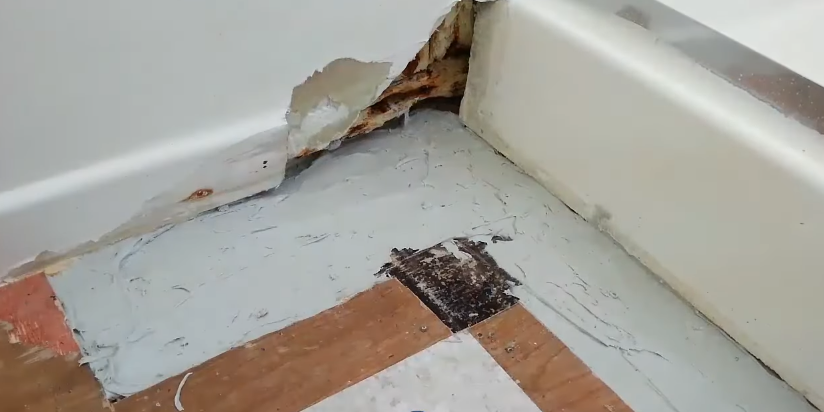
Step 4: Remove Damaged Materials
Bathrooms are built from materials that don’t love water—drywall, plywood, plaster, and adhesives all break down when wet.
- Cut out water-damaged drywall at least 12 inches above the waterline.
- Remove damaged insulation (it holds moisture and grows mold).
- Rip up rotten flooring or subfloor sections.
- Discard moldy caulk and grout.
If the damage is minor (like surface staining), you may not need to remove everything. But for anything spongy, crumbling, or smelly—replace it.
Step 5: Deal with Mold and Mildew
Mold thrives in damp bathrooms and can appear within 48 hours of water exposure.
How to handle it:
- Wear protective gear (mask, gloves, goggles).
- Clean small patches with a mixture of water and white vinegar or diluted bleach.
- Use a mold-resistant primer before repainting walls or ceilings.
- For large infestations, hire a professional remediation service.
Stats to know: The EPA (Environmental Protection Agency) recommends professional removal if mold covers more than 10 square feet.
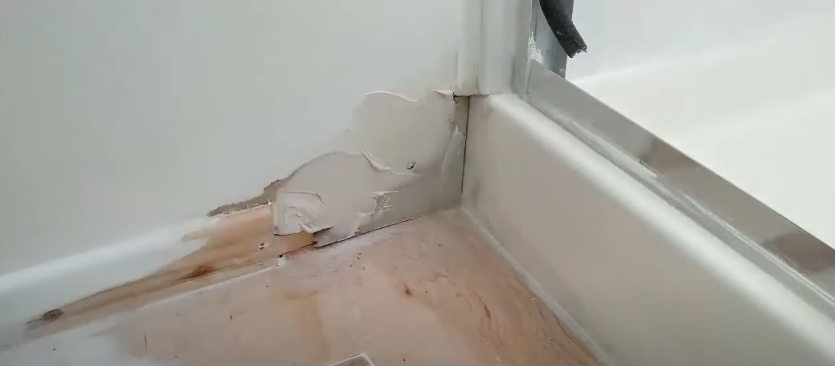
Step 6: Repair Structural Elements
This is where the real “fixing” starts.
- Subfloor repair: Replace rotted sections with water-resistant plywood. If concrete is cracked from water expansion, patch it with hydraulic cement.
- Wall repair: Install new drywall (preferably moisture-resistant “green board”).
- Ceilings: If stained but structurally sound, prime with a stain-blocking primer. If sagging, replace the panel.
- Framing wood: If studs are damp but solid, let them dry fully and treat with anti-mold spray. If rotted, replace.
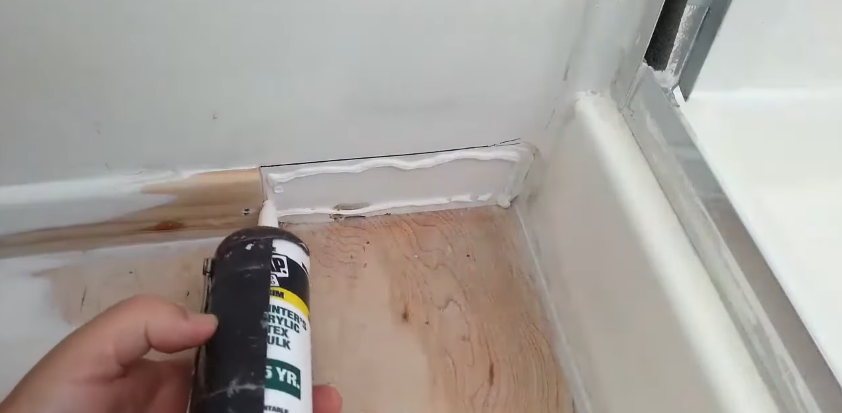
Step 7: Plumbing and Waterproofing Fixes
Water damage is usually a wake-up call to upgrade plumbing and waterproofing.
- Replace old pipes if they show signs of corrosion or leaks.
- Re-grout tiles with waterproof grout.
- Re-caulk tubs, sinks, and shower trays with bathroom-grade silicone.
- Install a waterproof membrane under new tiles or flooring to prevent future leaks.
These steps may feel like extra work now, but they prevent repeating the same nightmare later.
Step 8: Restore Flooring and Finishes
Once the structure is solid, bring your bathroom back to life.
- Flooring options:
- Ceramic/porcelain tiles: Durable and waterproof.
- Vinyl flooring: Budget-friendly and water-resistant.
- Natural stone: Beautiful but requires sealing.
- Paint: Always choose mold- and moisture-resistant bathroom paint.
- Cabinetry: If old cabinets absorbed water, replace with water-resistant MDF or PVC.
Fun fact: According to Remodeling Magazine’s Cost vs. Value Report, bathroom upgrades recoup around 67% of their cost when selling a home. Fixing water damage properly is both a safety measure and an investment.
Step 9: Improve Ventilation and Prevention
Repairing is only half the job. The smarter half is preventing future damage.
- Extractor fan: Upgrade to a high-capacity fan (at least 50–100 CFM depending on bathroom size).
- Window vents: Open during showers to reduce steam.
- Regular inspections: Check caulk and grout every 6–12 months.
- Install a leak detector: Small smart sensors can alert you to hidden leaks before they cause major damage.
Costs of Fixing a Water Damaged Bathroom
Let’s talk money.
- Minor repairs (surface mold, re-caulking, small drywall patch): $150–$500.
- Moderate repairs (new flooring, subfloor replacement, plumbing fixes): $1,000–$5,000.
- Major restoration (mold remediation, structural rebuild, full remodel): $5,000–$15,000+.

Insurance may cover some costs if the damage was sudden (like a burst pipe), but not if it was due to neglect (like ignoring a slow leak). Always check your policy.
My Personal Repair Story
A few years ago, I walked into my bathroom to find the floor squishy near the toilet. That sinking feeling in my foot matched the one in my stomach. I discovered a tiny leak from the wax ring under the toilet had been dripping for months. The result? Rotten subfloor, moldy drywall, and a repair bill that ate my holiday savings.
But here’s the bright side: After replacing the subfloor, upgrading the fan, and resealing everything properly, that bathroom stayed bone dry for years. I learned that water damage isn’t just about repair—it’s about redesigning the bathroom to resist water better than before.
Final Thoughts
Fixing a water-damaged bathroom takes time, patience, and sometimes professional help. But the steps are straightforward: stop the water, dry it out, remove the damage, repair the structure, and prevent future leaks.
It’s not glamorous work, but it’s the kind of repair that protects your home’s health and value. And once you’ve finished, you’ll not only have a safe, dry bathroom—you’ll also have peace of mind knowing you’ve tackled one of the most destructive household problems head-on.