Bathrooms are the unsung heroes of our homes. They endure splashes, toothpaste battles, and more than one accidental soap drop. But when the sink—the centerpiece of the bathroom—breaks, everything feels off.
Whether it’s a leak, crack, clog, or wobbly faucet, repairing a bathroom sink is less about brute force and more about understanding what’s gone wrong. Let’s walk through everything step by step, with real insights, not vague advice.
Understanding the Anatomy of a Bathroom Sink
Before repairing anything, you need to know the battlefield. A bathroom sink has a few main components:
- Basin (ceramic, porcelain, glass, or stone)
- Faucet (single or double handle, mixer, wall-mounted)
- Drain assembly (strainer, stopper, tailpiece)
- P-trap (that U-shaped pipe under the sink catching debris)
- Water supply lines (hot and cold pipes feeding the faucet)
- Sealants and caulking (keeping water where it belongs)
Most “broken sink” problems can be traced back to one of these areas. Think of them as suspects in a crime scene—you just need to interrogate the right one.
Common Types of Sink Problems
Your sink isn’t really “broken” until you know what’s wrong. Here are the most common culprits:
- Leaks (underneath, at the faucet base, or around the drain)
- Clogs (slow or completely blocked drainage)
- Cracks and chips in the basin
- Loose faucets or handles
- Damaged seals or caulking
- Wobbly or loose sink (common in pedestal and countertop sinks)
- Rust or corrosion (on metal parts like drain fittings)
Each one has its own fix, and we’ll break them all down.
Step 1: Fixing Leaks in the Sink
A leaky bathroom sink is like a dripping clock—it will test your patience until you deal with it. The leak could be in multiple spots:

Leaks From the Faucet
- Why it happens: Worn washers, O-rings, or cartridges inside the faucet.
- Fix:
- Turn off water supply.
- Disassemble the faucet handle using a screwdriver or Allen key.
- Replace the washer (for compression faucets) or the cartridge (for single-handle mixers).
- Reassemble and test.
Stats: According to the U.S. Environmental Protection Agency, a leaky faucet dripping just one drop per second wastes over 3,000 gallons of water a year. Fixing it saves water and your sanity.
Leaks Under the Sink
- Why it happens: Loose connections in the P-trap or cracked drainpipes.
- Fix:
- Place a bucket underneath.
- Check slip nuts on the P-trap and tighten by hand (don’t over-tighten or you’ll crack the washer).
- If the pipe itself is cracked, replace the section—it’s inexpensive PVC in most modern bathrooms.
Leaks Around the Drain
- Why it happens: The plumber’s putty sealing the drain flange has dried out.
- Fix:
- Unscrew the drain flange.
- Apply fresh plumber’s putty around the underside.
- Reinstall, tighten, and wipe away excess.
Step 2: Dealing With Clogs
If your sink drains slower than a teenager getting out of bed, you’ve got a clog.
- Quick Fix: Use a plunger (yes, plungers aren’t just for toilets).
- Deeper Fix:
- Unscrew the P-trap.
- Remove hair, soap scum, and gunk (you’ll want gloves for this).
- Reassemble and run hot water.
Personal Anecdote: The first time I unclogged a sink, I discovered enough hair to make a small wig. That was the day I swore never to underestimate how much shedding happens in front of a bathroom mirror.
- Chemical Drain Cleaners? Skip them. They’re harsh on pipes and often just push the clog further. Use a manual snake instead.
Step 3: Repairing Cracks and Chips in the Basin
Sinks can last decades, but drops of heavy objects (think perfume bottles) can crack porcelain or ceramic.
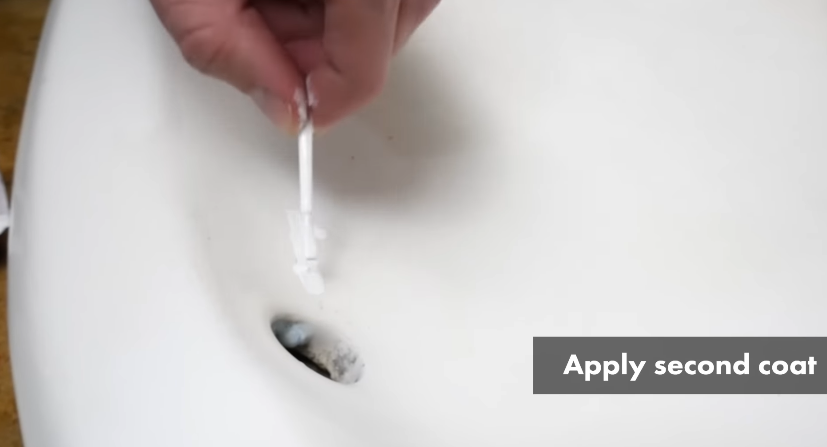
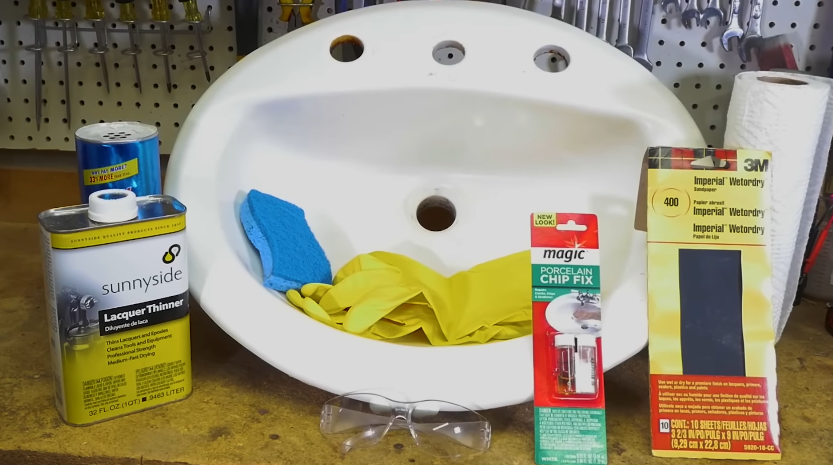
- Small Chips:
- Use a porcelain repair kit (epoxy-based).
- Clean the area, apply filler, sand smooth, then touch up with porcelain paint.
- Hairline Cracks:
- Epoxy resin can seal them and prevent water seepage.
- Apply carefully with a putty knife and sand after curing.
- Large Cracks:
- Sorry, no repair will last long. If the basin is split, replacement is the only safe option.
Fact: According to market research, the average bathroom sink lasts 15–20 years before major issues force a replacement.
Step 4: Tightening a Wobbly Faucet
A loose faucet feels like a steering wheel that’s about to fall off—not exactly reassuring.
- Fix:
- Look underneath the sink.
- Locate the mounting nuts securing the faucet.
- Tighten with a basin wrench (a lifesaver tool in tight spaces).
If the faucet is still unstable, the sink surface itself may be cracked, and you’ll need reinforcement plates.
Step 5: Replacing Damaged Sealant
Sealant and caulking keep water from sneaking into walls and countertops. Old sealant turns moldy or peels away.
- Fix:
- Cut away old silicone with a utility knife.
- Clean the area with rubbing alcohol.
- Apply fresh bathroom-grade silicone in a smooth bead.
- Smooth with a wet finger or silicone tool.
Tip: Always use silicone labeled mold-resistant. Cheap sealant will have you repeating this job in a year.
Step 6: Repairing a Loose Sink
If your pedestal sink wobbles or your countertop sink shifts, it’s a bigger concern than looks—it can cause leaks.

- Pedestal Sink:
- Check bolts at the base and wall brackets. Tighten them.
- Add shims if the floor isn’t perfectly level.
- Countertop/Vanity Sink:
- Reapply silicone between the sink and countertop.
- For undermount sinks, check the mounting clips beneath the counter.
Step 7: Battling Rust and Corrosion
Metal drain fittings and faucet parts often rust in older sinks.
- Surface Rust: Remove with baking soda paste or fine steel wool.
- Badly Corroded Parts: Replace entirely. A new drain kit costs under $20.
Reality check: If you see rust around the faucet base or drain that keeps coming back, water is seeping where it shouldn’t. Fix the leak, not just the rust.
Preventing Future Sink Problems
Fixing a broken sink is great, but preventing the next disaster is even better. Here’s how:
- Don’t pour grease or thick cosmetics (like clay masks) down the drain.
- Use a drain strainer to catch hair.
- Reseal silicone every 5–7 years.
- Inspect under the sink twice a year for small leaks.
- Clean aerators on faucets to maintain water pressure.
When to Repair vs Replace
Sometimes, repairs are worth it. Other times, replacement is smarter.
- Repair is enough if:
- The crack is small.
- The faucet just needs new washers.
- The clog is minor.
- Replacement is better if:
- The basin has large cracks.
- The sink leaks repeatedly despite repairs.
- Fixtures are outdated and inefficient.
Fun Stat: A modern WaterSense-certified faucet uses 30% less water than older models, saving about 700 gallons per household per year. Sometimes replacing is not only easier but also eco-friendly.
My Real-Life Sink Disaster
Once, in an old rental, I ignored a tiny drip under the bathroom sink. I figured, “How bad could it be?” Fast forward three months: the drip had rotted the wooden vanity base, warped the flooring, and even attracted ants (apparently, they love moisture). The repair bill? Over $600. The actual fix for the leak? A $3 washer.
Lesson learned: tiny sink problems grow into expensive disasters if ignored.
Final Thoughts
Repairing a broken bathroom sink isn’t rocket science, but it requires a methodical approach. First, identify the problem: leaks, clogs, cracks, or looseness. Then fix it with the right tools and materials—often much cheaper and faster than calling a plumber. But don’t hesitate to replace parts (or the whole sink) if the damage is beyond repair.
Your sink is the workhorse of your bathroom. Treat it well, catch problems early, and it’ll serve you faithfully for years.